Dec 3, 2025
FTA
How to Register for Corporate Tax in UAE: Step-by-Step Guide (2025)
Registering for corporate tax in the UAE might seem complicated, but with this step-by-step guide, you’ll get through it quickly and correctly - especially if you’re using Naqood to stay compliant.
Step 1 – Log in to EmaraTax
Visit EmaraTax and log in using your UAE PASS
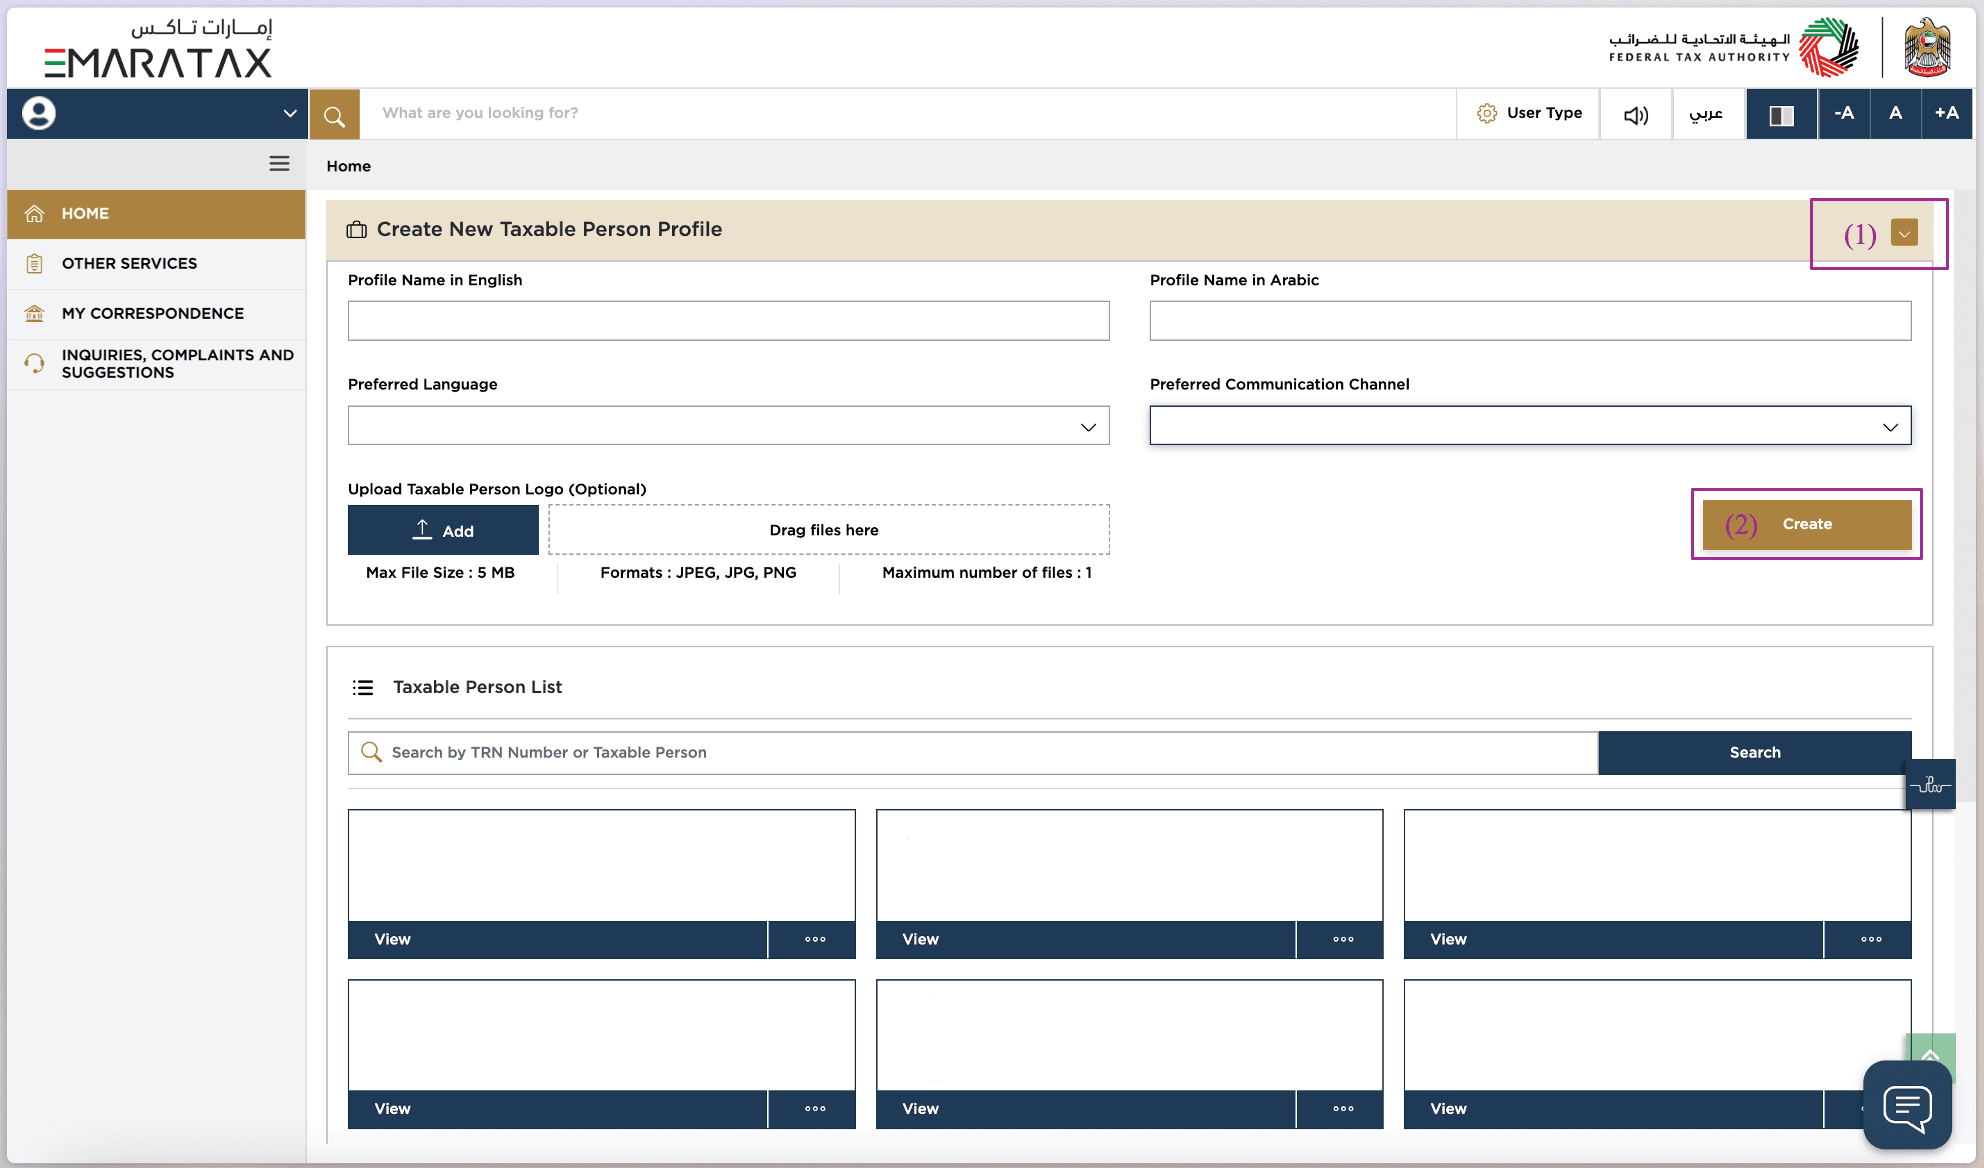
Step 2 – Create a Taxable Person Profile
Once logged in, click “Create New Taxable Person Profile” and fill out the following fields:
Profile Name in English
Profile Name in Arabic
Preferred Language
English
Arabic
Preferred Communication
Email
Both Email and SMS
Upload Taxable Person Logo (optional)
Then click Create to continue.
Press create
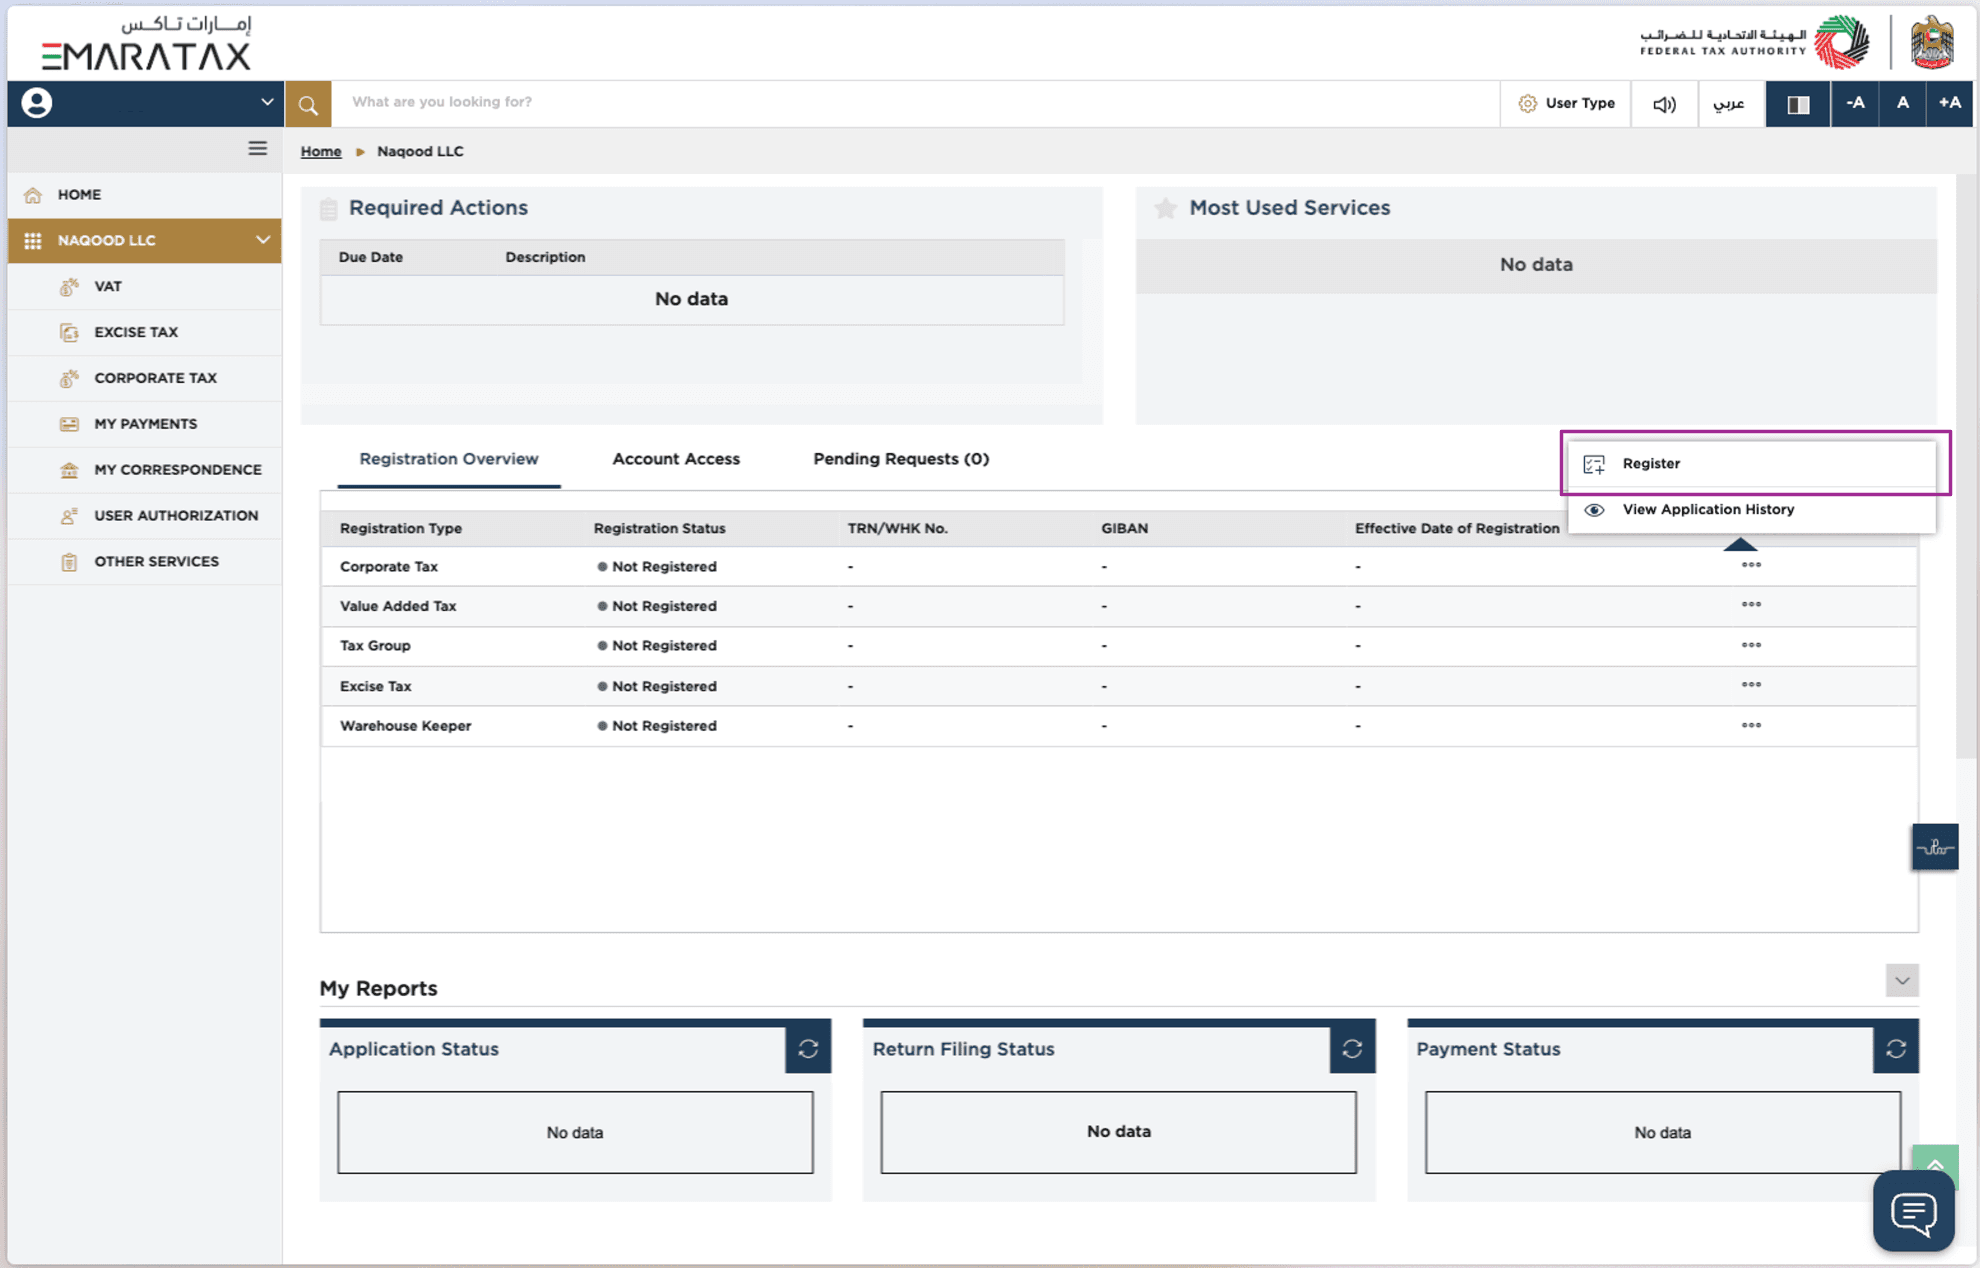
Step 3 – Start Corporate Tax Registration
Go to the Taxable Person Profile you just created
Find Corporate Tax
Click the three dots and select Register
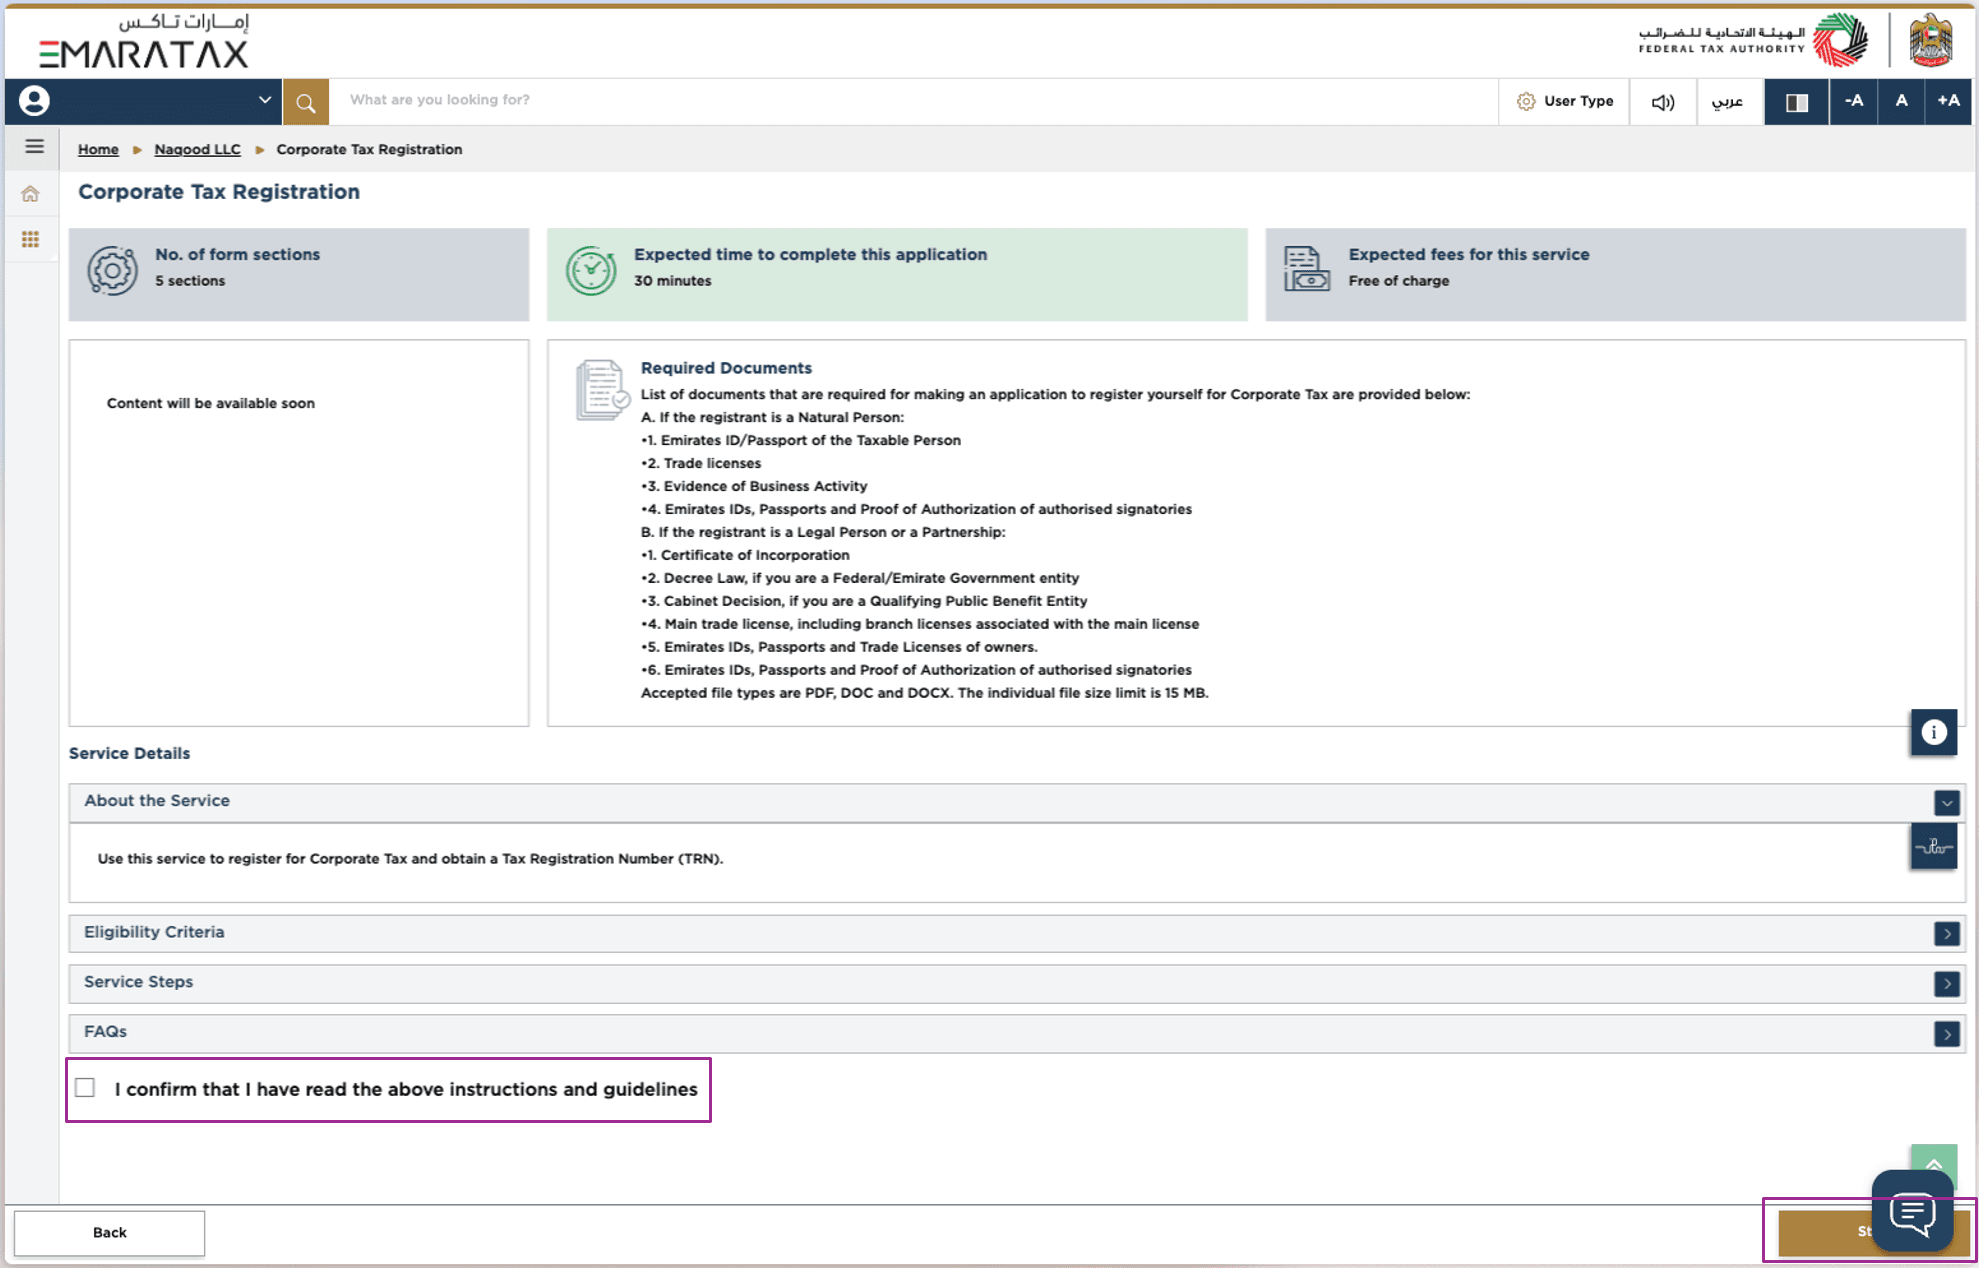
Step 4 – Accept and Continue
Review the FTA terms and press Accept and Continue to move forward.
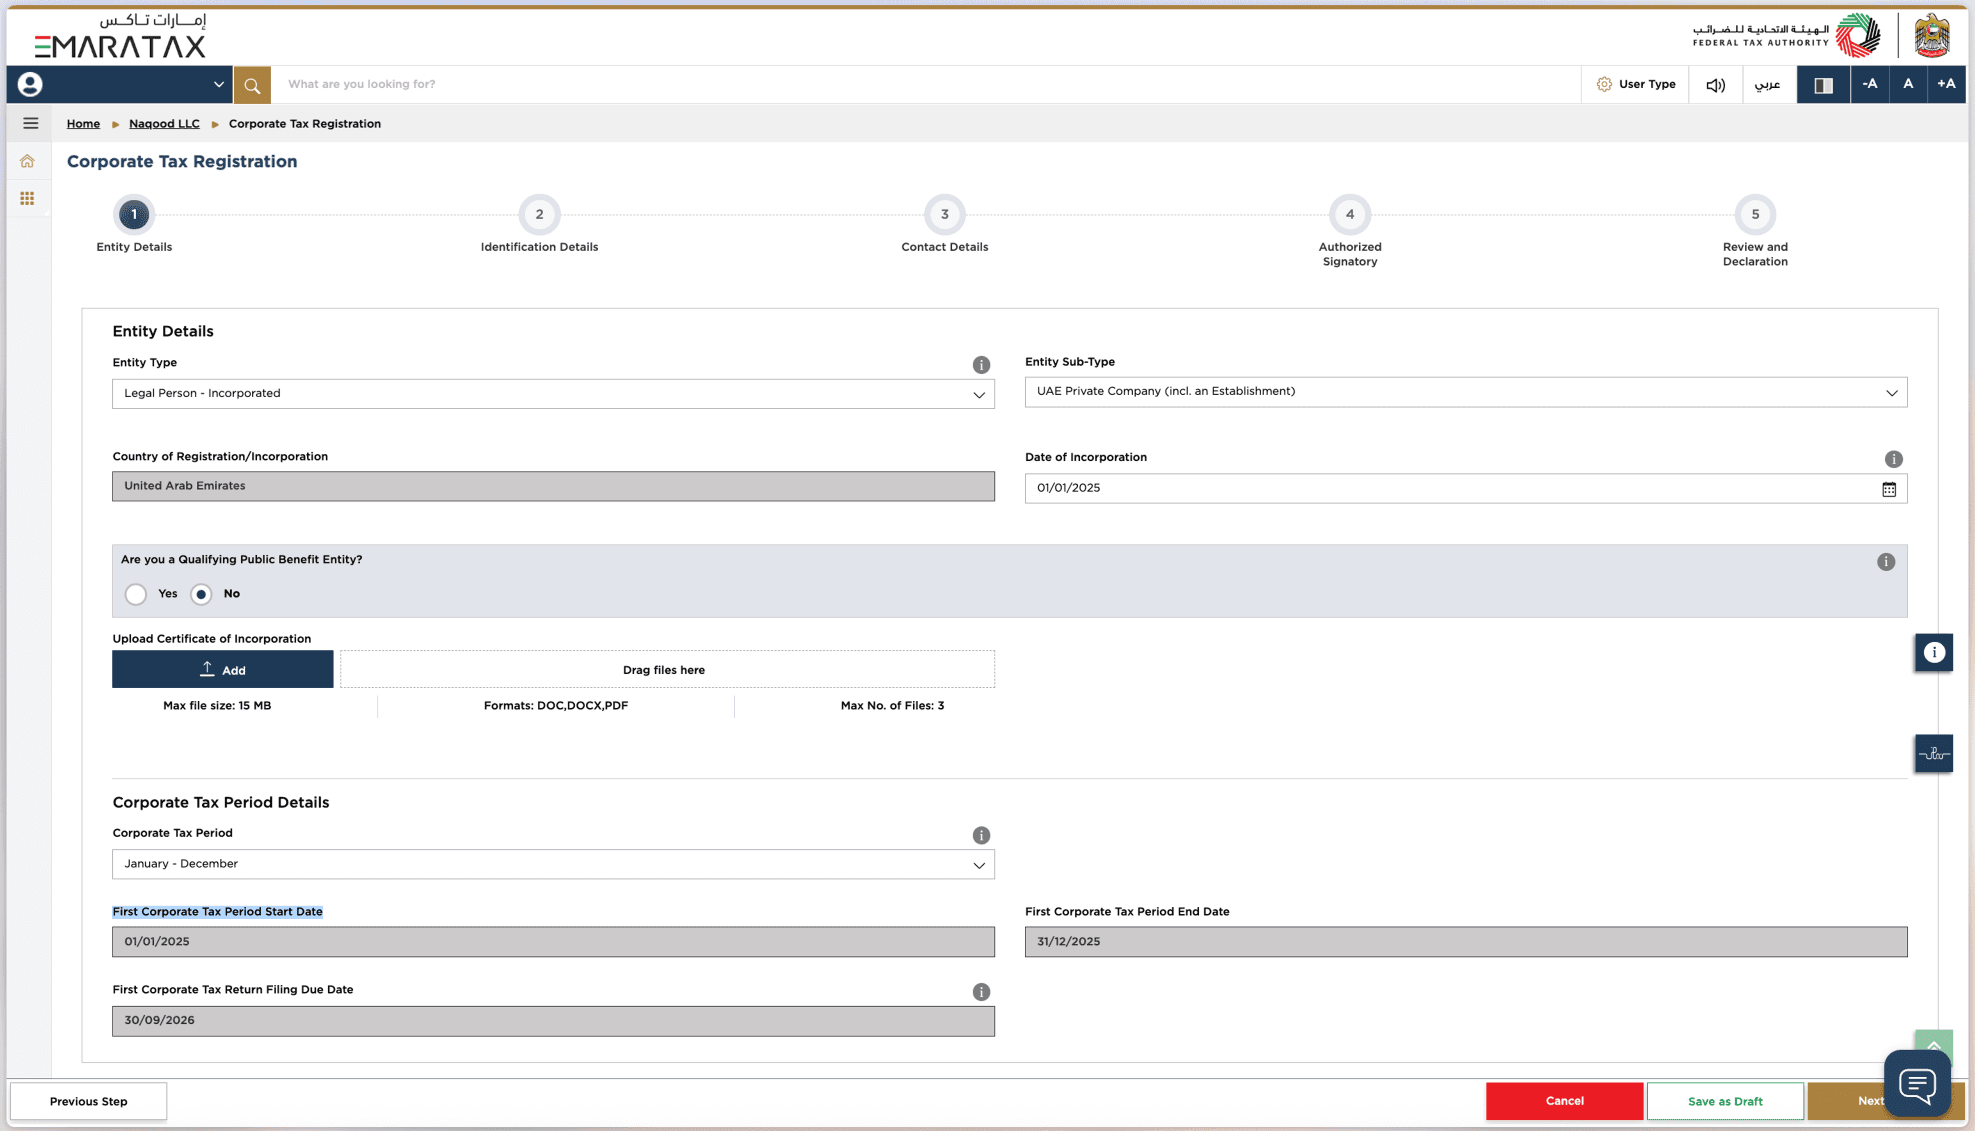
Step 5 – Fill in Entity Details
1. Entity Type
Select your business’s legal structure.
Natural Person
Legal Person – Incorporated (for LLCs, Free Zone companies & more)
Legal Person – Foreign Business
Legal Person – Club or Association
Legal Person – Charity
Legal Person – Federal Government Entity
Legal Person – Emirate Government Entity
Legal Person – Other
Partnership
For help choosing, read our full guide to FTA Entity Types in the UAE.
Most Naqood users are a “Legal Person – Incorporated” since this refers to a company that is incorporated in the UAE, such as a Limited Liability Company (LLC), Free Zone company (FZCO), Private Joint Stock Company (PJSC), or Public Joint Stock Company (PJSC).
2. Entity Sub-Type
If you select this are you also required to select a Entity Sub-Type, the 4 types are
UAE Private Company (Incl an establishment)
Public Joint Stock Company
Foundation
Trust
Most Naqood users are a UAE Private Company (Incl an establishment) since this is Limited Liability companies (LLC), Free Zone companies (FZCO) and sole establishments.
3 . Date of Incorporation
Enter the incorporation date found on your Trade License.
4 . Are you a Qualifying Public Benefit Entity?
Press Yes if your entity is listed in Cabinet Decision No. 37 of 2023 or is registered as a non-profit, foundation, or charity aligned with public benefit objectives.
Press No if you’re a for-profit business or not on the approved list.
5. Upload Certificate of Incorporation
6. Corporate Tax Period
This is a 12-month period. Most Naqood users select January to December to match the calendar year.
Start Date: Typically the same as your Incorporation Date.
Step 6 – Identification Details
Fill in the following:
Trade License Issuing Authority
Trade License Number
Trade License Issue Date
Trade License Expiry Date
Legal Name in English
Legal Name in Arabic

Step 7 – Business Activity Details
Your business activity is listed on your Trade License.
If unsure, you can search the DED list here:
🔗 Search DED Business Activities

Shareholding Information
Do any owners hold 25% or more of the business?
Press Yes if applicable
Press No if not
If you selected Yes, provide the following:
Owner Type:
Natural Person (private individual)
Legal Person (a company)
First Name / Last Name
Ownership Start Date
Shareholding Percentage
Corporate TRN
Upload Emirates ID + Emirates ID Number
Upload Passport + Passport Number

Branch Information
Do you have branches in the UAE related to this Trade License?
Press Yes or No accordingly.
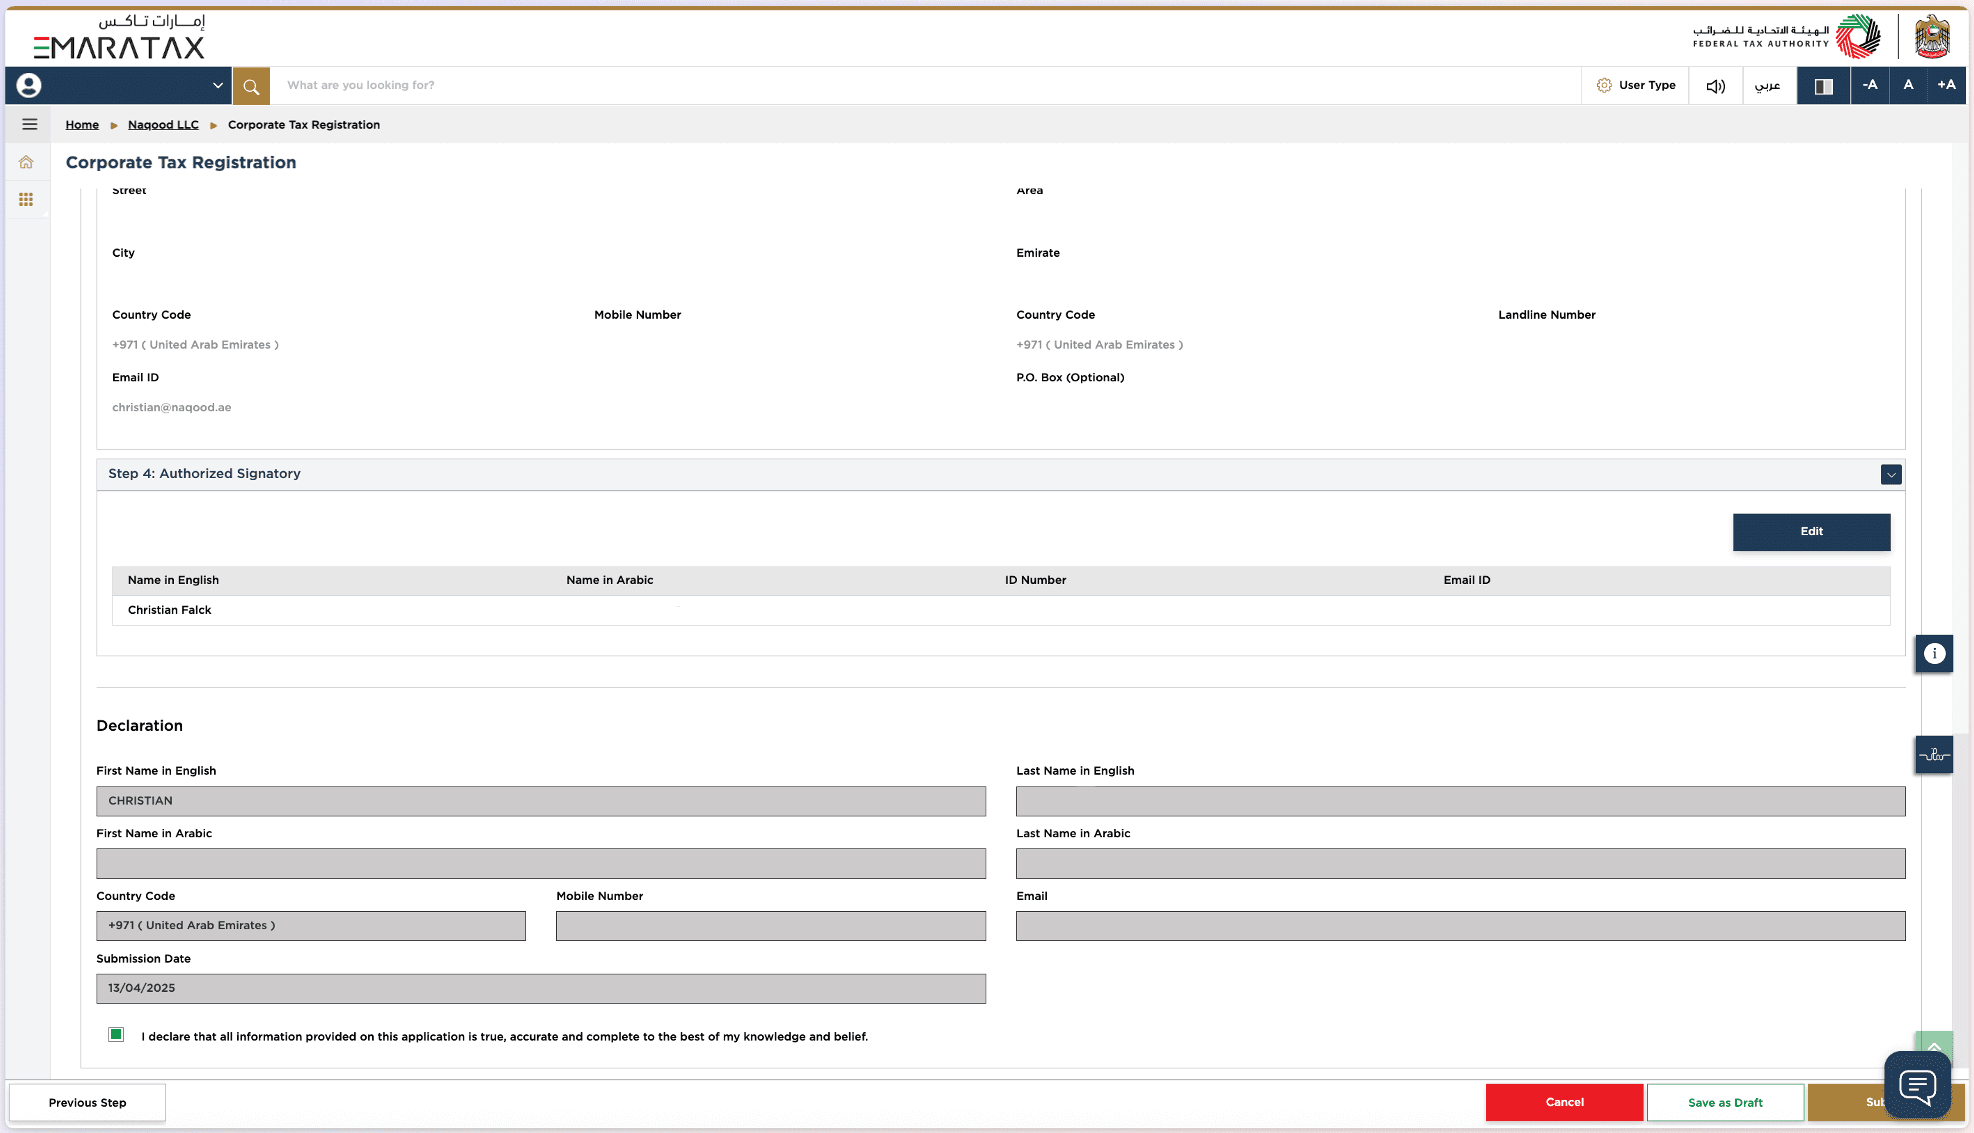
Step 8 – Contact Details
Enter your physical address and communication details:
Country
Building Name & Number
Street
Area
City
Emirate
Mobile Number
Landline Number
Email ID
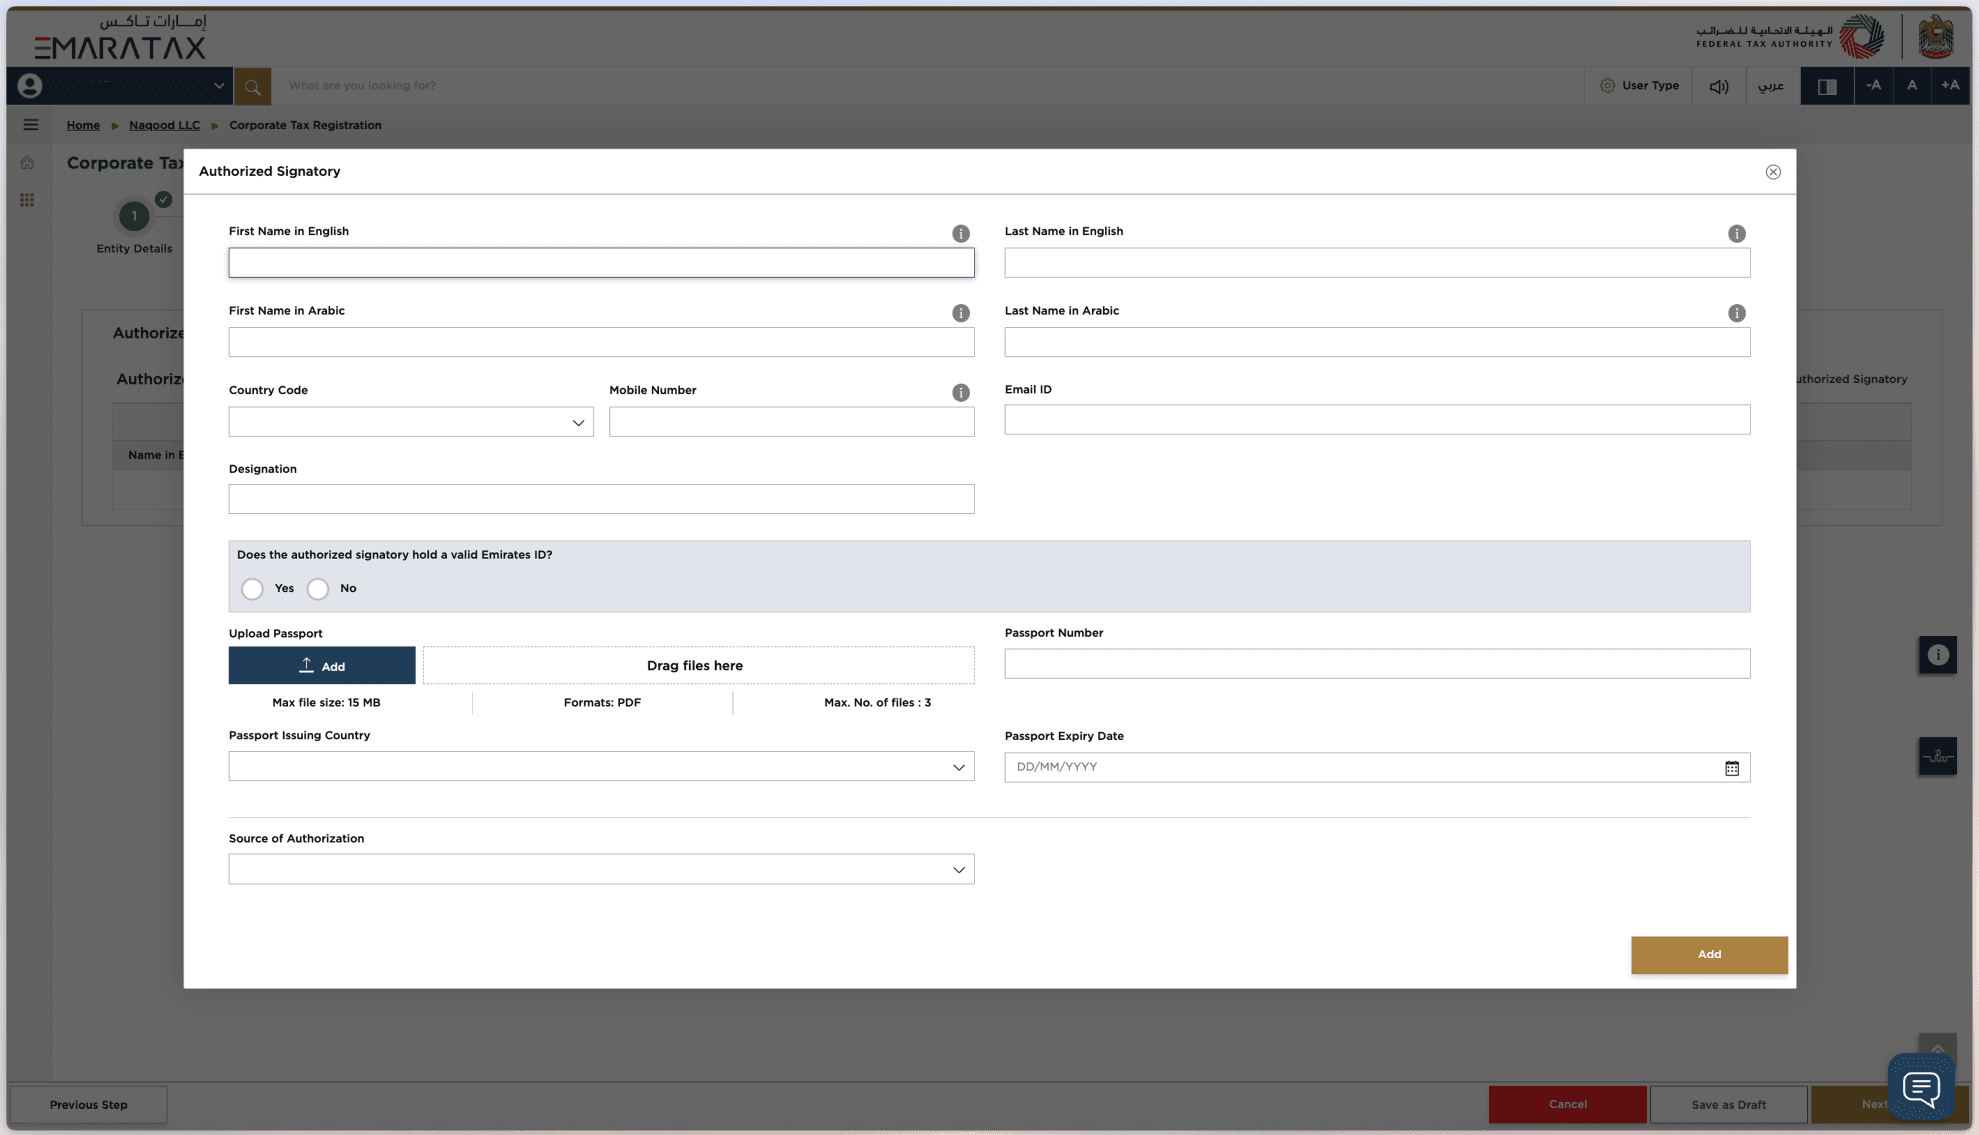
Step 9 – Authorized Signatory Details
Enter the details of the person authorized to sign on behalf of the company:
First & Last Name (English and Arabic)
Mobile Number
Email ID
Designation
Does the authorized signatory hold a valid Emirates ID?
If Yes: Upload Emirates ID, Number, and Expiry Date
If No: Upload Passport, Passport Number, and Expiry Date
Source of Authorization
Upload Memorandum of Association
Or upload Power of Attorney
Specify the court and date of execution
Step 10 – Review and Submit
Go over all the information you entered and click Submit. You’ll receive a confirmation email once your corporate tax registration is complete.

About the author
Christian Falck, a 2018 Copenhagen Business School graduate with a Master's in Finance and Accounting, also excelled at Columbia University in Corporate Finance. With 11+ years in accounting, his accounting firm won 3x Børsen Gazelle awards consecutively. Since 2021, he has been based in Dubai.

